Table
專案夾結構:
|
1 2 3 4 5 6 7 8 9 10 11 12 |
├── README.md ├── .github │ └── workflow │ └── automatic_update.yml │ ├── forder # 測試單層 folder │ └── test.html │ └── static # 測試多層 folder ├── css ├── js └── media |
步驟一. GCP Storage 設定
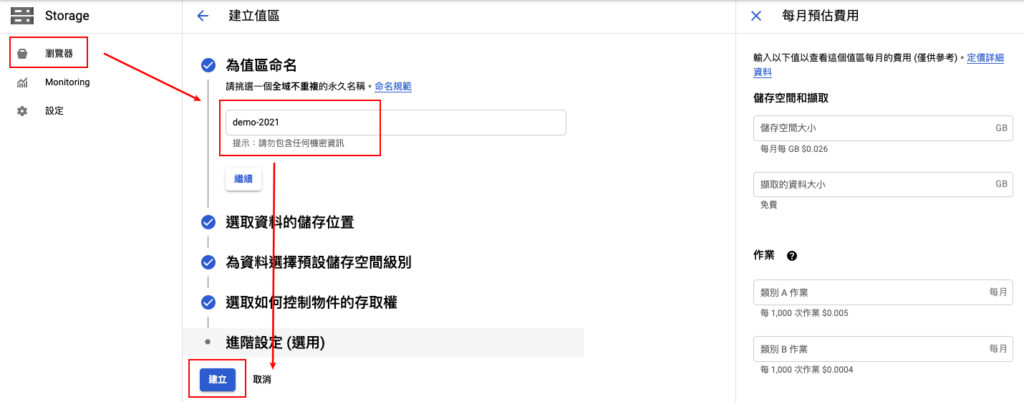
- 創建 Bucket
首先創建 Bucket,未來的網址 url 會與此命名有直接關係,例如這邊取名為 demo-2021,未來存取資料的 url 會是像這樣: https://storage.googleapis.com/demo-2021/README.md

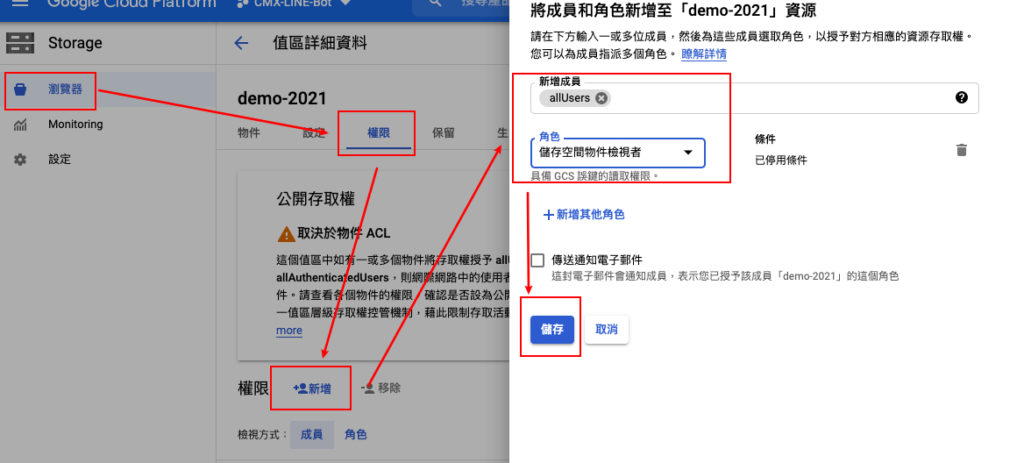
- 設定檢視權限
接下來我們會將此 Bucket 的權限設定為,
所有人都可以檢視,所以記得不要將機密資料放置於此 Bucket 內

- 取得憑證金鑰
最後我們會需要上傳或更新檔案至此 Bucket,所以需要申請憑證,待會在 Python 的 code 中會使用到此憑證。
申請憑證:https://console.cloud.google.com/apis/credentials

步驟二. 設定 GitHub Action
我們會在 project 位置中的 .github/workflows/ 新增一個 automatic_update.yml 檔案
這邊設定觸發條件是當 branch main 被 push 時觸發,當然你可以改成 pull 或是其他的 branch,甚至可以是定時任務on.schedule
|
1 2 3 4 5 6 |
name: Build and Deploy to Google Cloud Storage on: push: branches: - main |
使用 github 託管的
Virtual environment,想修改 ubuntu-latest 的話可以參考這篇 Specifications for GitHub-hosted runners
|
1 2 3 |
jobs: job: runs-on: ubuntu-latest |
首先使用 public action actions/checkout@v2 來 check out repository,讓 workflow 中能使用 $GITHUB_WORKSPACE 變數來存取專案
|
1 2 3 4 |
steps: - uses: actions/checkout@v2 - name: Check out repository run: ls -lah $GITHUB_WORKSPACE |
接下來使用 google-github-actions/upload-cloud-storage@master 來 uploads files/forders 到 GCP Storage 上
|
1 2 3 4 5 6 |
- name: Upload google-cloud-storage uses: GoogleCloudPlatform/github-actions/upload-cloud-storage@master with: path: ${{ github.workspace }} destination: pycon2021 credentials: ${{ secrets.GCP_CREDENTIALS }} |
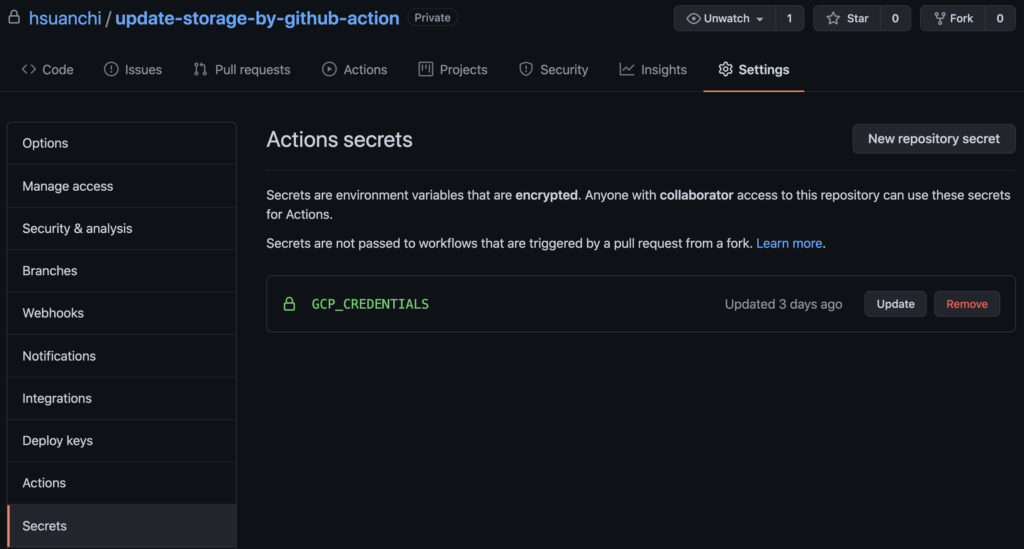
步驟三. 設定 GitHub Action Secrets key
到專案資料夾,選擇 setting > Secrets,將剛剛在 GCP 拿到的憑證內容完整貼上去就可以囉!

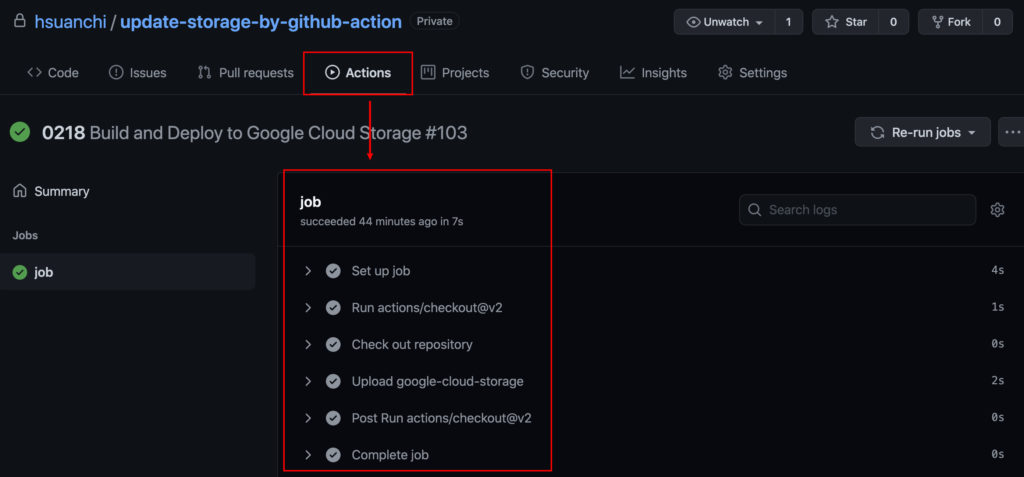
最後只需要 git push 就可以看到以下畫面囉,然後再去 google cloud storage 確認有沒有上傳的檔案就完成了!

