
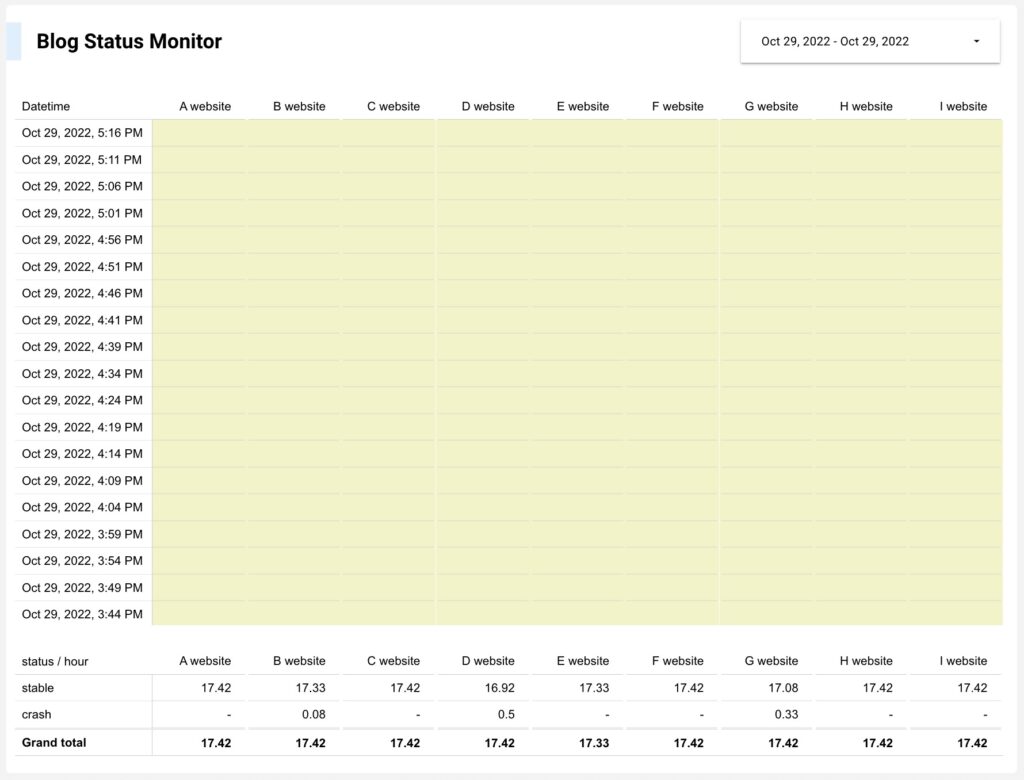
This tutorial is a step-by-step explanation of how to build up a blog monitor. We will use the Google Sheet to get the website status and Google Looker Studio to display the blog status. In the end, you will build up the dashboard as below.
目錄
1. Copy the google sheet
First, copy this google sheet here. Next, you need to modify the column A and column B in “config” sheet:
- column A (website): you can change to any name here.
- column B (url): adjust the URL to your blog, Plz note that remove the “https://”.
- column C (title): no action here, the script will update this raw.
- column D (status): no action here, the script will update this raw.
- column E (datetime): no action here, the script will update this raw.
If you want to monitor many websites simultaneously, you can add one more raw in “config” sheet.
2. Set up the App Script in google sheet
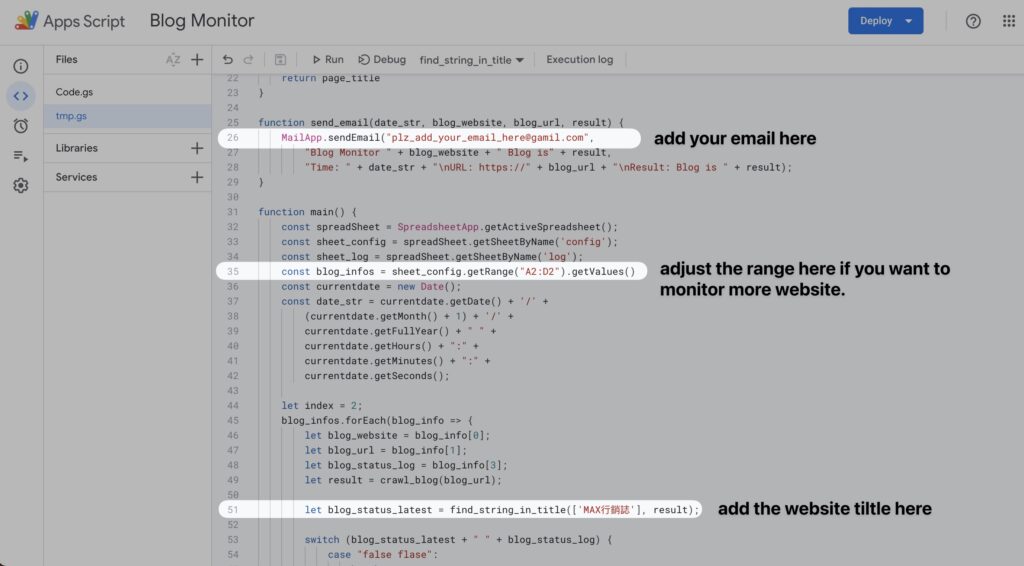
Click the “Extensions” > “App Script” and add the code below.
Step 1 – Replace your email in line 26.
Step 2 (option) – adjust the range if you want to monitor more webste in line 35.
Step 3 – add your websites title in line 51.
You can see the flow chart below, the system will send email when the sever start crash (case 1) and restore (case 2).

|
1 2 3 4 5 6 7 8 9 10 11 12 13 14 15 16 17 18 19 20 21 22 23 24 25 26 27 28 29 30 31 32 33 34 35 36 37 38 39 40 41 42 43 44 45 46 47 48 49 50 51 52 53 54 55 56 57 58 59 60 61 62 63 64 65 66 67 68 69 |
function find_string_in_title(array, page_title) { const result = false array.forEach(keyword => { if (page_title.indexOf(keyword) > -1) { result = true } }); return result } function find_page_title(text, begin, end) { const firstChar = text.indexOf(begin) + begin.length; const lastChar = text.indexOf(end); const newText = text.substring(firstChar, lastChar); return newText; } function crawl_blog(blog_url) { const url = "https://" + blog_url; const response = UrlFetchApp.fetch(url).getContentText(); const page_title = find_page_title(response, "<title>", "</title>") return page_title } function send_email(date_str, blog_website, blog_url, result) { "Blog Monitor " + blog_website + " Blog is" + result, "Time: " + date_str + "\nURL: https://" + blog_url + "\nResult: Blog is " + result); } function main() { const spreadSheet = SpreadsheetApp.getActiveSpreadsheet(); const sheet_config = spreadSheet.getSheetByName('config'); const sheet_log = spreadSheet.getSheetByName('log'); const blog_infos = sheet_config.getRange("A2:D2").getValues() const currentdate = new Date(); const date_str = currentdate.getDate() + '/' + (currentdate.getMonth() + 1) + '/' + currentdate.getFullYear() + " " + currentdate.getHours() + ":" + currentdate.getMinutes() + ":" + currentdate.getSeconds(); let index = 2; blog_infos.forEach(blog_info => { const blog_website = blog_info[0]; const blog_url = blog_info[1]; const blog_status_log = blog_info[3]; const result = crawl_blog(blog_url); const blog_status_latest = find_string_in_title(['MAX行銷誌'], result); switch (blog_status_latest + " " + blog_status_log) { case "false flase": break case "true true": sheet_config.getRange(index, 5).setValue(date_str); break; case "true false": sheet_config.getRange(index, 5).setValue(date_str); sheet_config.getRange(index, 4).setValue(true); send_email(date_str, blog_website, blog_url, "back"); break; case "false true": sheet_config.getRange(index, 5).setValue(date_str); sheet_config.getRange(index, 4).setValue(false); send_email(date_str, blog_website, blog_url, "down"); break; } // send to log tab sheet_log.insertRowsAfter(1, 1); sheet_log.getRange("A2:C2").setValues([ [date_str, blog_website, blog_status_latest] ]); index += 1; }); |
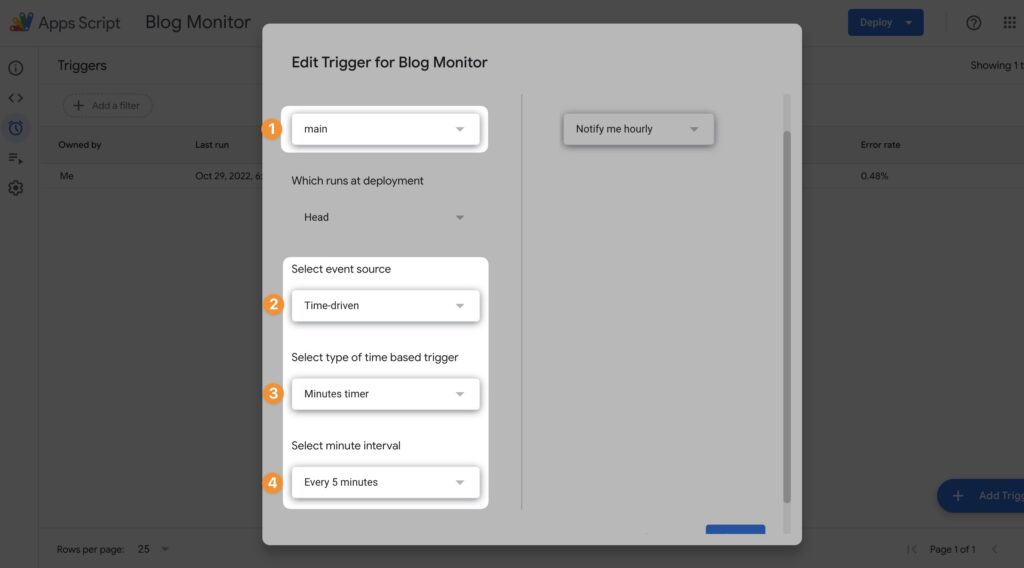
3. Set up the Schedule
Edit the Trigger. We choose every 5 minutes to trigger one time. You can adjust to one minute or one hour here.
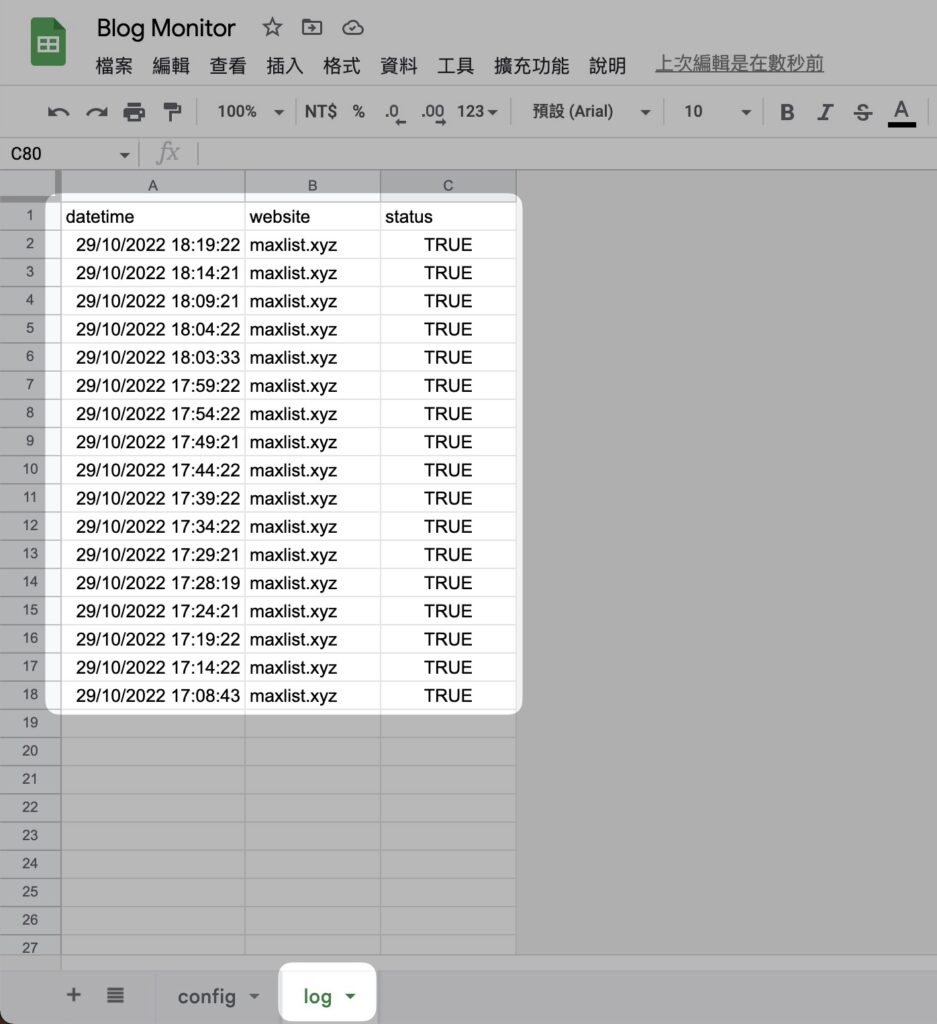
After you set up the trigger, you can see the logs in “log” sheet.
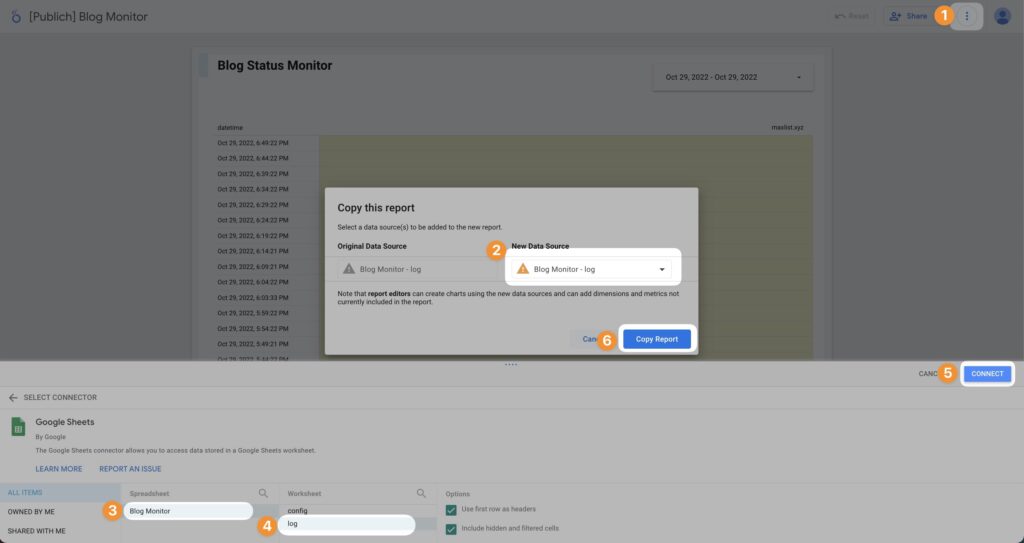
4. Set up the Google Looker Studio
Copy the looker studio here, and follow the below step to append your google sheet data.
Congratulations! You did it!
Thanks for your reading. I hope this article will help you build up your blog monitor.